A cake drum is not just a sturdy base for your cake; it’s an essential element that adds elegance and stability to your creations. Whether you’re a professional baker or an enthusiastic hobbyist, knowing how to craft your own cake drum can save costs while allowing you to customize its design to perfectly suit your cake theme.
In this guide, we’ll take you through a step-by-step process to make a durable and decorative cake drum, ensuring your cakes not only taste amazing but also make a striking visual impression. Let’s get started!
1. How To Make a Cake Drum?
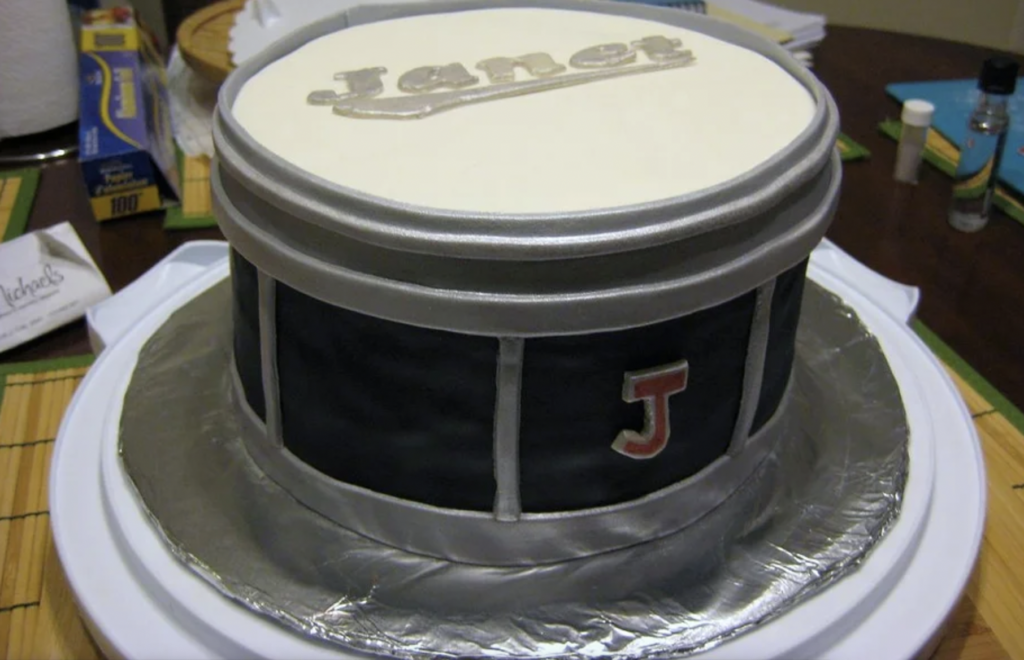
Ingredients
- Chocolate cake: Large chocolate cakes.
- Buttercream icing: To cover the cake.
- Pizza box and tinfoil: Used to make a cake board if you don’t have one.
- Fondant: To cover the cake, black fondant is preferred, or chocolate fondant for easier coloring.
- Icing coloring (food coloring): For tinting the fondant black and other colors.
- Gum paste: Mixed with fondant to stiffen it for detailed decorations.
- Silver dust: To create shimmering details.
- Vodka: Used to mix with silver dust to make a paintable paste.
- Red icing coloring: For painting red details.
Additional tools:
- Clean paintbrush: For applying glue or painting details.
- Pizza cutter: For trimming fondant.
- Plastic sheet or parchment paper: To assist with handling small details.
Directions
1Cake: Cake chocolate cakes. Big ones! Put them on a cake board and cover them in buttercream icing. Let the buttercream set in the fridge for 30 minutes.
Don’t have cake boards? Neither did I. Cut a circle from a pizza box and cover it in tinfoil.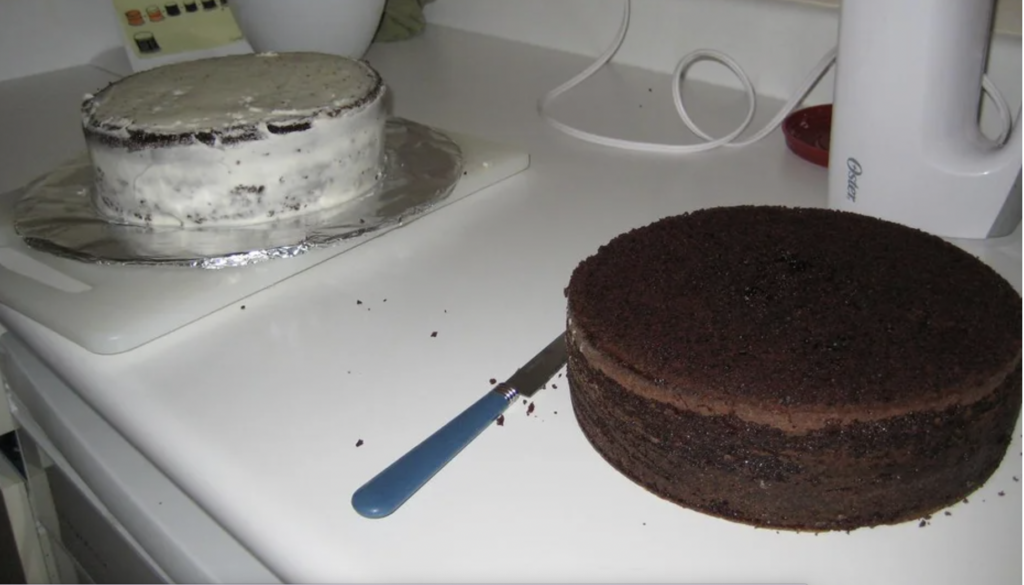
2Fondant: Cover the whole cake in a layer of fondant, tinted black. It takes a whole lot of icing colouring to get black, so dump a lot in at once. If you can find chocolate fondant, it will become black with less colouring.
To get the fondant onto the cake, you first need to roll it out onto a sheet of plastic.
Then drape the fondant, still attached to the plastic, over your rolling pin.
Gently slide the fondant and plastic over the cake.
Peel off the plastic.
Smooth out the fondant to adhere to the buttercream.
Trim around the bottom. I use a pizza cutter.
Now cut out another round of fondant, this time leave it white.
Place it on top of the black fondant.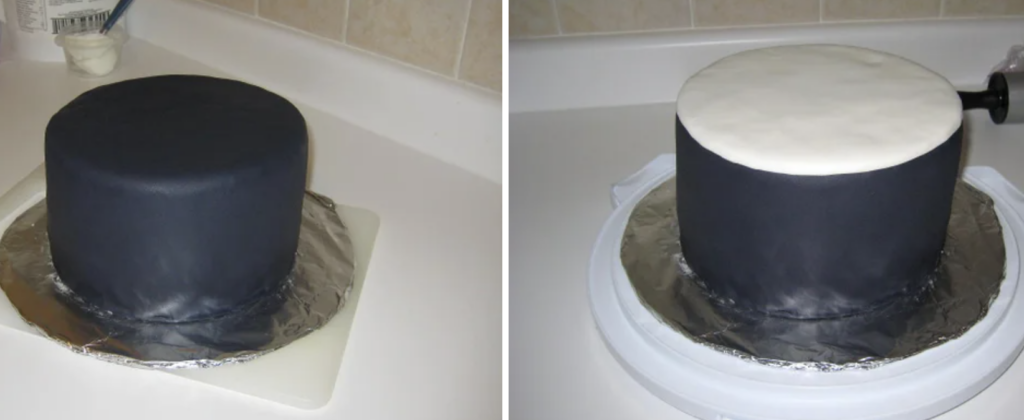
3Mix some gum paste with fondant, leave it white. The gum paste will stiffen the fondant a bit, making it sturdier.
Place a strip of white gum paste+fondant (gumdant?, fonpaste?) along the top and bottom.
To get it to stick, dissolve a pea sized piece of gum paste in a teaspoon of water, or whatever you feel like. Once it is dissolved, you will have a sort of glue to use. Brush some on with a little clean paintbrush.
Add a few more accent pieces.
Now, the silver part.
To make it shimmer, you will need some silver dust you can find in cake shops. Mix a bit with vodka, not water, to make a paste. Water dissolves sugar, remember? The vodka will evaporate, leaving the dust.
Paint this paste onto your white pieces.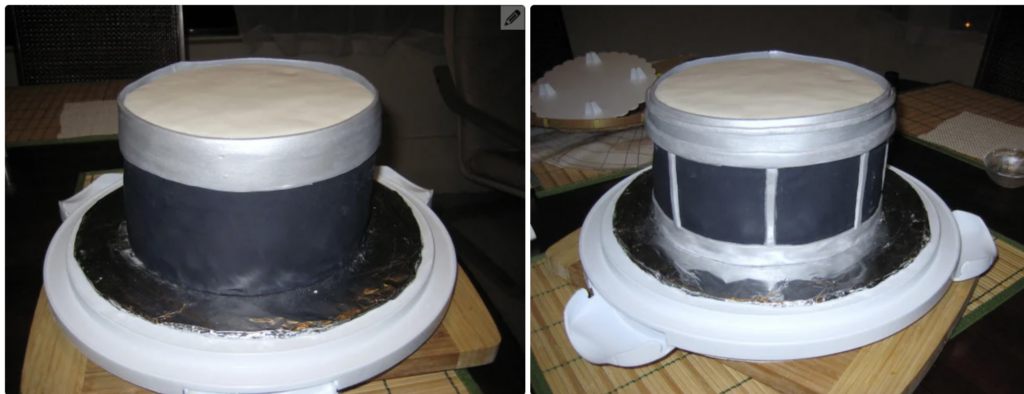
4Details 2: To make these I used just gum paste, as these can be flat and don’t need to taste great. (Gum paste dries hard)
To cut out I painstakingly printed out the letters on a piece of paper, cut them out, traced them onto fondant. I then carefully cut the fondant with a series of different tools.
Then I painted them with the vodka silver paste.
These items can be cut and painted on a flat surface, on parchment paper or something. Let them dry and they will stiffen up for handling.
Glue them on with the sugar and water stuff you made before.
I painted the ‘J’ with red icing colour.
Enjoy your finished product while you can.


