


Kirby, the beloved pink puffball from Nintendo’s iconic video game series, has won the hearts of many with his adorable design and endless charm. If you’re a fan of this cute character and want to bring him to life in the form of a delicious dessert, making a Kirby cake is the perfect way to do so! Whether it’s for a birthday party, a gaming event, or just a fun baking project, this guide will walk you through the steps to create a delightful and visually stunning Kirby cake that’s sure to impress. Let’s get started!
1. What is a Kirby Cake?
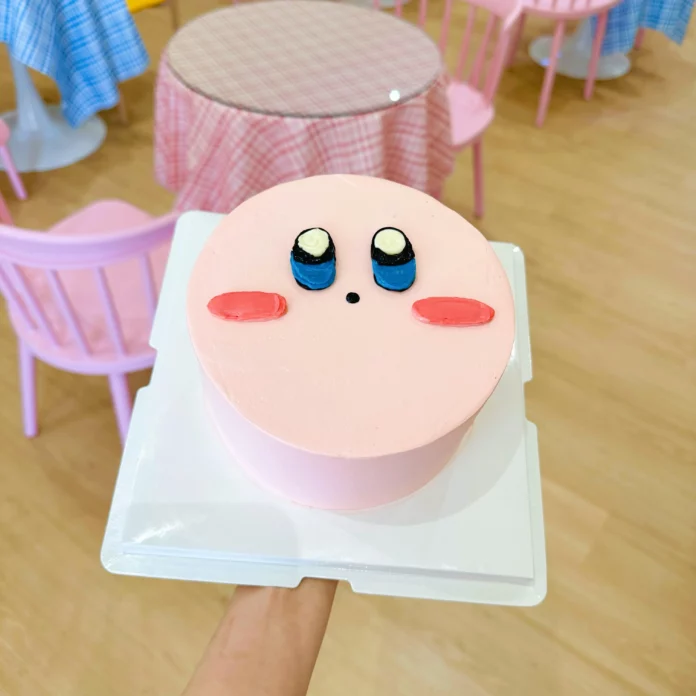
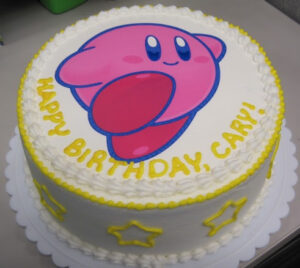
A Kirby cake is a themed cake designed to resemble Kirby, the adorable pink character from Nintendo’s popular video game series. The cake is typically round, covered in pink frosting, and decorated with facial details to bring Kirby to life.
* Flavor of a Kirby Cake:
The flavor of a Kirby cake can vary depending on the recipe used. Some popular flavors include:
- Vanilla sponge cake: Light, fluffy, and subtly sweet, making it a great base for decorations.
- Chocolate cake: Rich and decadent, perfect for chocolate lovers.
- Strawberry cake: Naturally pink from strawberries, offering a sweet and slightly tangy taste.
The cake is usually covered with buttercream frosting or whipped cream frosting to achieve Kirby’s signature pink color. Some versions use fondant for a smoother and more polished look.
* Caloric Content of a Kirby Cake:
The calorie content of a Kirby cake depends on the ingredients and portion size. Below is an estimate per 100g slice:
- Vanilla sponge cake with buttercream frosting: ~350–400 kcal
- Chocolate cake with buttercream frosting: ~400–450 kcal
- Strawberry cake with whipped cream frosting: ~300–350 kcal
For a standard 1kg Kirby cake, the total calorie content can range from 2500–3500 kcal. To make a lower-calorie version, you can substitute buttercream with light whipped cream or reduce the sugar content in the cake.
2. How to make a kirby cake?
Ingredients
For the Cake (Vanilla or Strawberry Sponge Cake)
- 2 ½ cups (310g) all-purpose flour
- 2 ½ tsp baking powder
- ½ tsp salt
- 1 cup (225g) unsalted butter, softened
- 1 ¾ cups (350g) granulated sugar
- 4 large eggs
- 1 tbsp vanilla extract
- 1 cup (240ml) whole milk or buttermilk
- (Optional for strawberry cake): ½ cup (120g) strawberry puree and a few drops of pink food coloring
For the Buttercream Frosting (Pink for Kirby’s Body)
- 1 cup (225g) unsalted butter, softened
- 4 cups (480g) powdered sugar
- 2-3 tbsp heavy cream or milk
- 1 tsp vanilla extract
- Pink food coloring
For Decoration (Kirby’s Face and Feet)
- Red fondant (for Kirby’s feet)
- White fondant (for eyes)
- Black fondant (for eyes and mouth)
- Blue food coloring (for eyes)
- Edible pink dust or blush powder (for Kirby’s cheeks)
Directions
1
To begin, preheat your oven to 350°F (175°C). This ensures that your cake bakes evenly. Prepare two 8-inch (20cm) round cake pans by greasing them with butter or non-stick spray. Line the bottoms with parchment paper to prevent sticking.
In a medium-sized bowl, whisk together the flour, baking powder, and salt. This dry mixture will help the cake achieve a light and fluffy texture. Set the bowl aside.
Next, take a large mixing bowl and beat the butter and sugar together using an electric mixer. Continue mixing until the mixture becomes light and fluffy, which usually takes about 2-3 minutes. This step is crucial for incorporating air into the batter, making the cake soft.
Add the eggs one at a time, beating well after each addition. Stir in vanilla extract to enhance the cake’s flavor.
Now, gradually add the dry ingredients to the butter mixture, alternating with milk. Start with the dry ingredients, add some milk, then repeat until both are fully incorporated. Be careful not to overmix, as this can make the cake dense.
If you want a strawberry-flavored Kirby cake, gently fold in strawberry puree and add a few drops of pink food coloring. This will give the cake a delicious fruity flavor and a beautiful pink hue.
Finally, divide the batter evenly between the two prepared cake pans. Smooth the tops with a spatula to ensure even baking.
2
Place the cake pans in the preheated oven and bake for 30-35 minutes. To check if the cakes are done, insert a toothpick into the center—if it comes out clean, they are ready.
Once baked, remove the cakes from the oven and let them cool in the pans for about 10 minutes. Then, carefully transfer them to a wire rack and allow them to cool completely before frosting.
3
While the cakes are cooling, prepare the buttercream frosting. Start by beating the butter in a l
Gradually add the powdered sugar, mixing at low
Add vanilla extract and heavy cream (one tablespoon at a time) until the frosting reaches a smooth, spreadable consistency.
Finally, stir in pink food coloring until you achieve Kirby’s signature pink shade. Mix well to ensure the color is evenly distributed.
4
Once the cake layers have cooled completely, place one layer on a serving plate or cake stand. Spread a generous amount of pink buttercream frosting evenly over the top.
Place the second cake layer on top of the first, aligning them carefully. Then, use the remaining pink buttercream to cover the entire cake. Use a spatula or cake scraper to smooth out the frosting, giving the cake a clean and polished look.
5
- Creating Kirby’s feet: Roll out red fondant and shape it into two oval feet. Place them at the base of the cake to resemble Kirby’s signature look.
- Making the eyes: Cut white fondant into two oval shapes. Using blue food coloring, paint the lower half of each eye to create the iris. Then, cut small black fondant circles for the pupils. Carefully place the eyes on the cake.
- Shaping the mouth: Roll out a small piece of black fondant and shape it into a curved smile. Position it below the eyes to complete Kirby’s happy expression.
- Adding the blush: Lightly brush edible pink powder onto both sides of the face to give Kirby his signature rosy cheeks.
6
Before serving, allow the cake to set for about 15-20 minutes. This helps the frosting firm up slightly, making it easier to cut.
Once set, slice the cake and enjoy your homemade Kirby cake! The combination of soft sponge cake, creamy buttercream, and fun decorations makes this an irresistible treat for any Nintendo fan.


